Key takeaways
- A landscape design moves through fixed stages: site visit, inventory and base plan, concept, planting plan, phasing and installation. Skipping the base plan is where most plans go wrong.
- Northern Virginia clay, oak and maple shade, and deer in Great Falls, Oakton and western Loudoun decide the plant list before taste does.
- Foundation plantings for colonials and townhomes are sized by mature width, kept off the siding and below the sills, and layered from the corners inward.
- Most HOAs review front-yard beds, trees and screening. A scaled planting plan with a plant list is what the architectural application usually needs.
- As of 2026, typical Northern Virginia planning ranges run from a few hundred dollars for a single-area planting plan to $15,000 to $50,000 or more for a full property installed in phases.
On this page
- What does a landscape design process actually involve?
- How does a landscape plan go from a site visit to an installed yard?
- How do you design planting beds for Northern Virginia clay?
- What grows under mature oaks and maples?
- How do you design for deer in Great Falls, Oakton and western Loudoun?
- Which native and adapted plants work in Northern Virginia yards?
- What makes a good foundation planting for a colonial or a townhome?
- What do HOAs in Northern Virginia say about plants and beds?
- How do you phase a landscape plan over several years?
- What should you have ready before a design site visit?
- Why is winter the best season to design a landscape?
- How much does landscape design and installation cost in Northern Virginia in 2026?
- How does landscape design differ across Fairfax, Loudoun, Prince William, Arlington and Alexandria?
- Frequently asked questions
What does a landscape design process actually involve?
A landscape design process for a Northern Virginia home has six stages: a site visit, a measured inventory and base plan, a concept, a planting plan with a plant list, a phasing and budget schedule, and installation. Each stage depends on the one before it. The site visit tells us what the property is, the base plan tells us what fits, the concept decides how the yard will be used, and the planting plan turns all of that into names, sizes and quantities that can be priced, approved by an HOA and planted in the right season.
That order matters more here than in most places, because the yard has three things to say before the homeowner does. The soil is clay, so drainage and bed preparation shape every bed. The canopy is often oaks and maples that are older than the house, so shade and roots decide what lives. And across much of Fairfax and Loudoun, deer walk through every night and edit the plant list for you. A design that starts with a mood board and ends with a nursery receipt skips all three, which is why so many foundation plantings in Ashburn and Vienna are replaced twice in ten years.
This article walks through each stage the way we do it on our landscape design and installation projects, then covers the local problems the plan has to solve: clay, shade, deer, HOA rules and the budget. If you are reading this in February, you are in the right month. Winter is design season, and we explain why near the end.
How does a landscape plan go from a site visit to an installed yard?
Six stages, in the order they have to happen. A single bed can move through them in a couple of weeks; a whole property takes a season of planning.
Site visit and conversation
We walk the property with you and ask how you use it: where children play, which windows you look out of, what you want hidden, how much upkeep you will honestly do. We note sun at different hours, wet spots, slopes, utilities and plants worth keeping.
Inventory and base plan
We measure the house, lot lines, walks, drive, patio, trees and bed edges and draw them to scale. The base plan records trunk sizes and canopy spread, downspout locations, the sprinkler layout if one exists, and where water goes after a storm. Everything later is drawn on top of it.
Concept plan
A loose drawing that sets bed shapes, lawn area, screening lines, paths and the places where a patio, wall or lighting might go later. No plant names yet. This is where we agree on the big moves, such as whether the front lawn shrinks or the side yard becomes a path and planting bed.
Planting plan and plant list
Each plant is drawn at its mature spread, named by variety, and counted. Sizes at planting are specified, usually by container size. The list is organized by bed so it can be priced, checked against deer and shade, and attached to an HOA application.
Phasing and budget
If the plan is more than one season of work, we break it into phases with an order that protects what is already built. Drainage and hardscape first, then trees and screening, then beds, then lawn and lighting. Each phase gets its own planning range.
Installation
Virginia 811 marks utilities, old plantings come out, beds are amended across their full area, plants are set at the right depth and watered in, and beds are edged and mulched. Trees and shrubs go in during fall or spring, which is why planning happens in winter.
How do you design planting beds for Northern Virginia clay?
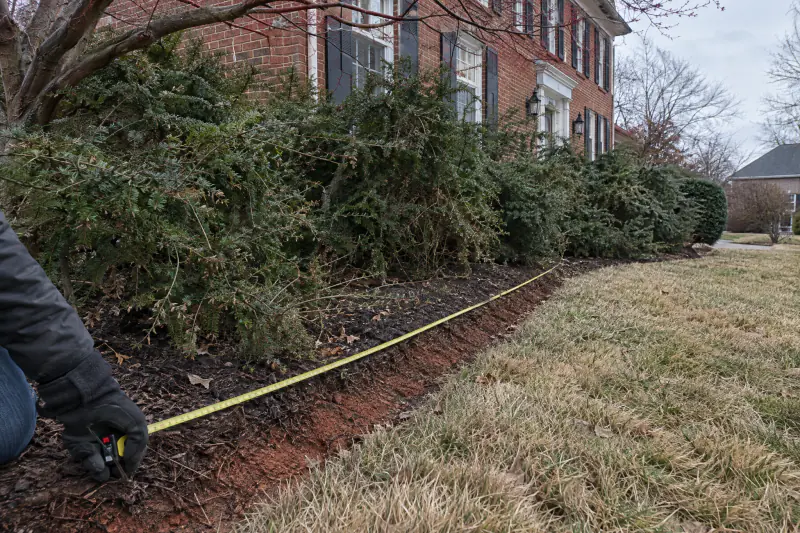
You design beds for clay by preparing whole beds rather than holes, planting high, and choosing plants that accept slow drainage. Most of our service area sits on dense, reddish clay subsoil that holds water for days after rain and turns to brick in August. Dig a single rich hole in that clay and you make a bathtub: water fills the loosened pocket, roots circle inside it and the shrub drowns or never leaves the hole. The fix is to loosen the entire bed to a depth of six to eight inches and work in two to three inches of compost across all of it, so the amended zone is continuous and water has somewhere to move.
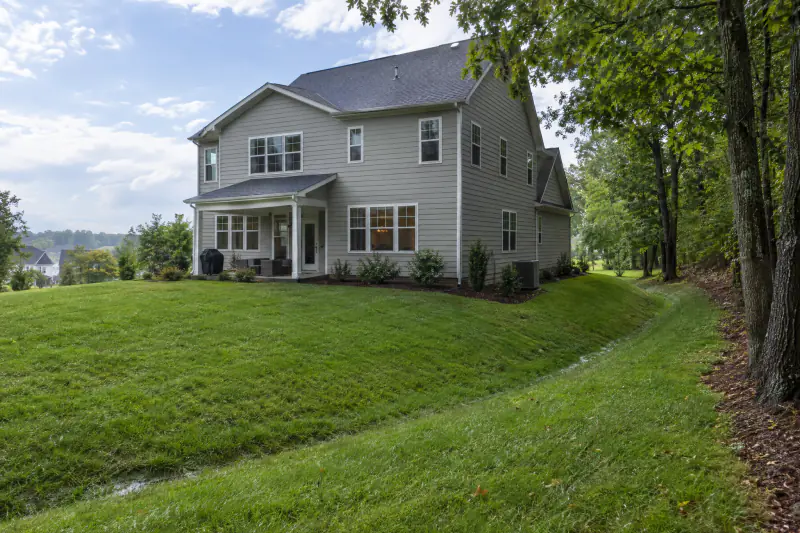
Planting high is the second rule. We set the top of the root ball an inch or two above the surrounding grade and taper soil up to it, so the root flare of a tree or shrub stays visible and the crown never sits in standing water. On a flat lot where water lingers, the bed itself is mounded a few inches, or the problem is handed to the drainage trade first. If a bed holds a puddle for more than a day after a storm, no plant list will save it, and the honest sequence is yard drainage and regrading before planting. We cover why clay behaves this way in why Northern Virginia backyards stay wet.
The third rule is to test before amending. A routine soil test through Virginia Cooperative Extension, processed by the Virginia Tech soil testing laboratory, reports pH and nutrient levels for a modest fee and tells us whether a bed needs lime, which most acidic clay here does, and whether it needs anything else. Guessing at fertilizer is wasteful and, near streams that feed the Potomac and Occoquan, it is a pollution problem. We would rather spend the budget on compost than on bags of something the soil already has.
Finally, we match plants to clay instead of fighting it. Inkberry holly, Virginia sweetspire, winterberry, summersweet, river birch, swamp white oak, switchgrass and most sedges tolerate heavy, periodically wet soil. Lavender, many Mediterranean herbs and plants sold as needing sharp drainage usually do not, however well they looked at the garden center in May.
What grows under mature oaks and maples?
Under mature oaks and maples, the plants that thrive are the ones that evolved in a Virginia forest understory: ferns, sedges, foamflower, woodland phlox, wild ginger, hellebores, oakleaf hydrangea, spicebush, fothergilla and native azaleas. What does not thrive is lawn. Tall fescue needs several hours of direct sun, and the spot under a forty-year-old willow oak in McLean or Burke rarely gets it. Every year the grass thins, the owner reseeds, and the shade wins. A design accepts that and turns the area into a shade bed, a mulched woodland floor or, where a usable surface is needed, something other than grass.
The roots matter as much as the shade. Most of a large tree's feeding roots live in the top twelve inches of soil and spread well past the canopy edge. We do not till under a mature tree, do not raise the grade over its roots with more than an inch or two of material, and do not cut roots larger than a thumb to fit a plant. Instead we plant small, in pockets between roots, and let the bed knit together over three or four seasons. Perennials in quart and gallon pots establish under trees far better than big shrubs with heavy root balls that need a large hole.
Water is the quiet problem. A maple pulls hundreds of gallons from the soil on a July day, so new plants beneath it are competing with a far larger neighbor. Summer watering of a new shade bed is a two-year commitment, and a drip line from a sprinkler system with a dedicated zone makes that realistic. Mulch is kept to two inches and pulled back from trunks, because deep mulch piled against a tree invites rot and rodents.
One more design decision: whether the shade is dry or wet. A high oak canopy on a slope in Great Falls gives dry shade, and the list leans toward Christmas fern, sedges and hellebores. A low spot under red maples in Lorton or Springfield gives wet shade, and the list shifts to sweetspire, cinnamon fern and summersweet. The base plan, with its notes on where water sits, is what tells us which one we have.
How do you design for deer in Great Falls, Oakton and western Loudoun?
You design for deer by assuming they will visit, choosing plants they usually pass over, and protecting the few favorites you insist on keeping. Deer pressure is heaviest along the Potomac and the Bull Run and Occoquan corridors, which means Great Falls, McLean, Oakton, Clifton, Reston, and nearly all of western Loudoun from Leesburg to Purcellville and Aldie. It is lighter in dense parts of Arlington, Alexandria and Falls Church, though not absent. A plan for a Clifton acre and a plan for an Alexandria rowhouse garden should not share a plant list.
In heavy-pressure areas we build the plan on plants deer rarely browse: boxwood, inkberry and American holly, pieris, spicebush, mountain laurel, hellebore, ferns, ornamental grasses, catmint, mountain mint, Russian sage, bluestar and most aromatic herbs. We avoid, or fence, the plants that read as salad: hosta, daylily, yew, most azaleas and rhododendrons, tulips, Emerald Green arborvitae, and the tender new growth of almost any hydrangea. No plant is deer-proof. A hungry herd in a hard February will sample boxwood and strip holly, and a buck in October will rub the bark off a young tree whatever its species. For that reason every young tree in deer country gets a trunk guard or a cage through its first few winters.
Screening is where deer do the most expensive damage. A row of Emerald Green arborvitae planted in Oakton is often browsed bare to five feet in its first winter, leaving a hedge with legs. Green Giant arborvitae, Nellie Stevens holly and a mixed screen of hollies and native evergreens hold up far better, and we lay out the options on our service page. Fencing, where the HOA allows it, is the only fully reliable answer, and a plan can be drawn so that the most vulnerable plants sit inside a fenced back yard while the front relies on resistant species.
Which native and adapted plants work in Northern Virginia yards?
A working list drawn from plants we specify most often. Deer notes are typical behavior, not promises, and heavy pressure areas should expect some browsing on anything.
| Plant | Light | Clay and wet soil | Deer browsing | Role in the plan |
|---|---|---|---|---|
| Inkberry holly (Ilex glabra) | Sun to part shade | Tolerates wet clay | Usually light | Foundation shrub, low hedge |
| Virginia sweetspire (Itea virginica) | Sun to shade | Thrives in wet spots | Usually light | Massing, rain garden edge, fall color |
| Oakleaf hydrangea | Part shade | Good drainage preferred, tolerates clay | Moderate | Woodland bed anchor, large shrub |
| Fothergilla | Sun to part shade | Tolerates clay, dislikes standing water | Usually light | Mid-layer shrub, spring bloom, fall color |
| Redbud (Cercis canadensis) | Sun to part shade | Tolerates clay | Light | Small flowering tree near the house |
| Serviceberry (Amelanchier) | Sun to part shade | Tolerates clay | Light to moderate | Small multi-stem tree, birds |
| River birch | Sun | Loves wet clay | Light | Fast shade tree for low, wet areas |
| Switchgrass (Panicum virgatum) | Full sun | Tolerates wet and dry | Usually light | Screening, winter structure |
| Pennsylvania sedge (Carex pensylvanica) | Shade | Prefers dry to average | Light | Lawn alternative under trees |
| Christmas fern | Shade | Average to dry | Light | Evergreen groundcover under oaks |
| Mountain mint (Pycnanthemum) | Sun | Tolerates clay | Light | Pollinator massing, aromatic |
| Catmint (Nepeta) | Full sun | Needs decent drainage | Light | Front-of-bed perennial along walks |
Plants are chosen by light, moisture and mature size first. Fully native plans are possible; most of our plans mix Virginia natives with well-behaved adapted plants such as boxwood and catmint.
What makes a good foundation planting for a colonial or a townhome?
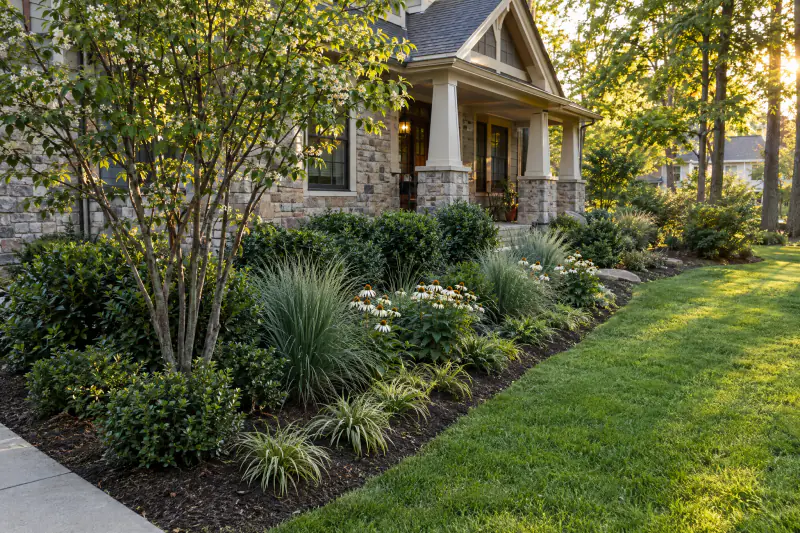
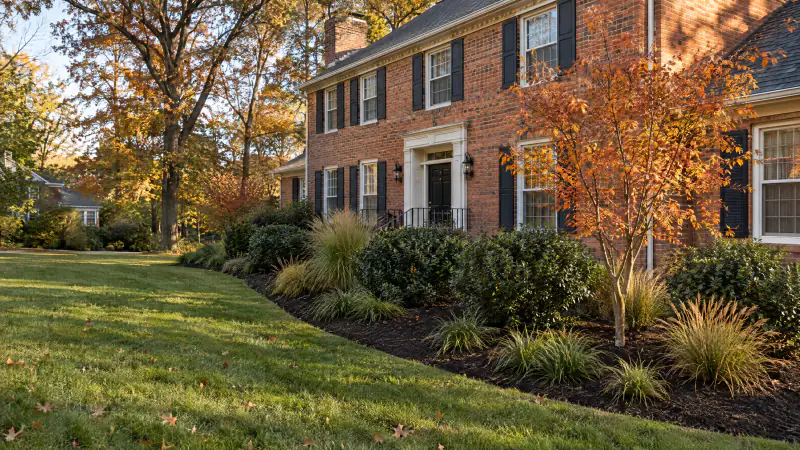
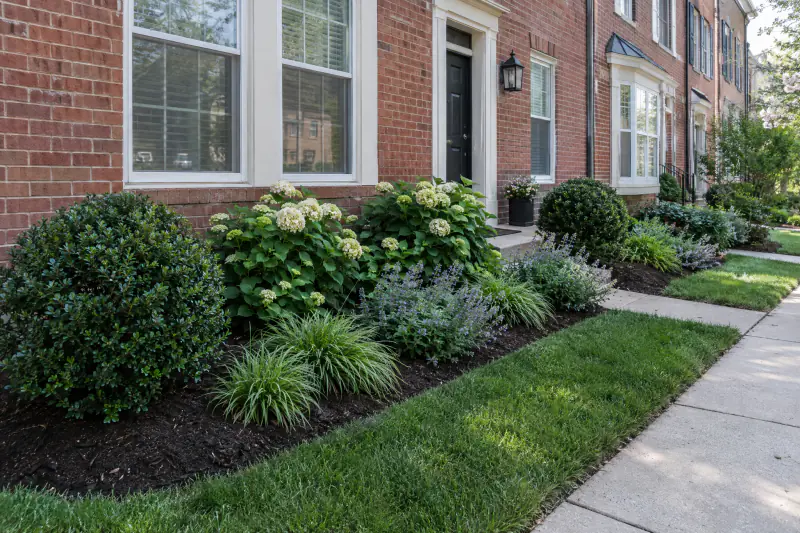
A good foundation planting frames the house instead of hiding it: anchor plants at the corners, a mid-height layer below the windows, a low layer along the walk, and bed depth generous enough that nothing touches the siding at maturity. Most Northern Virginia colonials have a tall, flat front face with a centered door and windows at a consistent sill height, which makes the rules simple. Corner plants can be the tallest, often a small tree or a large evergreen set off the corner so it softens the edge rather than blocking it. Under the windows we keep mature height below the sill, which usually means shrubs that top out around three to four feet. In front of those, perennials, sedges and low evergreens carry the bed to the walk.
Bed depth is where builder plantings fail. A two-foot strip against the brick leaves no room for anything to mature, so shrubs are sheared into boxes or lean into the siding. We draw front beds at least five to six feet deep on a colonial, and we keep the mature edge of any shrub two to three feet off the wall so air moves, brick dries after rain and a painter or gutter crew can get in. Hose bibs, electric meters, dryer vents, AC units and egress window wells are marked on the base plan and kept clear.
Townhomes in Ashburn, South Riding, Centreville and Woodbridge work with less room and more rules. A front bed may be three to four feet deep and shared visually with a neighbor's, so the planting needs restraint: one small tree where there is space, a repeated shrub for continuity, and a low layer that tolerates reflected heat from the walk and the brick. Columnar and compact varieties earn their place here. Back yards are often fenced, shaded by the house on one side and the neighbor's fence on the other, and small enough that a paver patio with planting around its edge uses the space better than a struggling lawn. We treat those yards as outdoor rooms first and gardens second.
Whatever the house style, the long view matters. A foundation bed is seen from the street at thirty feet and from the front door at three. Plants with a strong shape, evergreen structure for winter and a bloom or color change at some point in the year earn their place at both distances. A bed of one variety repeated along the whole front rarely does.
What do HOAs in Northern Virginia say about plants and beds?
Most planned communities in Northern Virginia require architectural approval for visible landscape changes, and many publish rules on bed size, plant height, tree placement, mulch, edging and fencing. The details vary enormously. Some associations approve any planting that stays below a stated height near the street and sight lines. Others, particularly larger associations in Reston, Ashburn, Brambleton, South Riding, Burke and the Prince William communities around Gainesville and Bristow, publish design guidelines with approved plant lists, limits on how much of the front lawn can become bed, and rules about vegetable gardens, artificial turf and screening along property lines. A few regulate mulch color. Check your own covenants before the plan is finished, not after.
The planting plan is the application. Nearly every architectural review committee asks for a scaled drawing showing bed outlines, plant names and mature sizes, and some want photos of the existing conditions. A plan drawn to scale with a plant list by bed answers all of that in one document, and we prepare ours so it can be attached without rework. Review cycles are typically measured in weeks, and committees that meet monthly can add a month if a submission misses a meeting, so a plan for spring planting should be in by late winter. Our guide to HOA approval for exterior projects covers the process in more detail.
Two more layers sit above the HOA. County rules on trees and vegetation apply near streams, where a Chesapeake Bay Resource Protection Area may restrict clearing and some planting within a buffer, so check with your county if your lot backs to a creek. And Virginia lists several common nursery plants as invasive, including Bradford pear, Japanese barberry, burning bush, English ivy and nandina. We do not specify them, and a growing number of HOAs and county programs now discourage them as well.
How do you phase a landscape plan over several years?
You phase a plan by building from the ground up and from slow to fast: fix water first, build anything with a footing second, plant trees and screening third, fill beds fourth, and finish with lawn and lighting. The order protects each phase from the next. A bed planted before the patio goes in gets trampled by the patio crew. A lawn seeded before drainage is fixed gets dug up for the drain. Trees planted in year one are three years larger by the time the beds around them are finished, which is exactly when you want them to be.
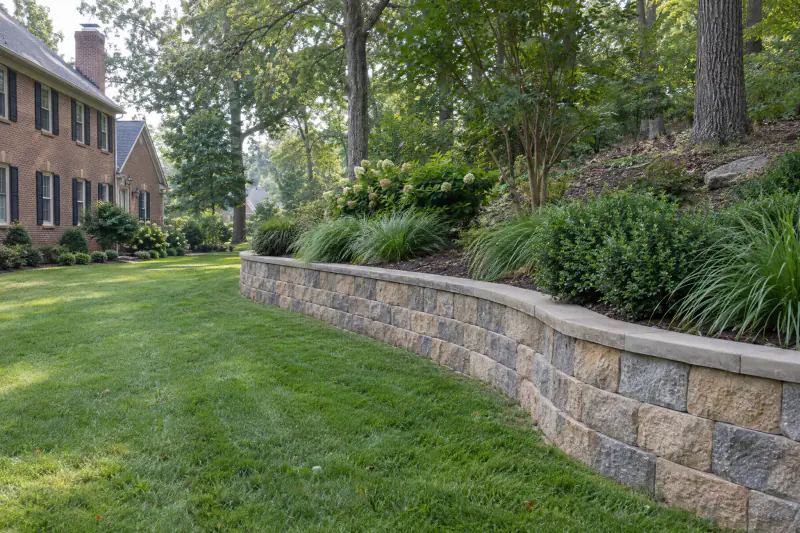
A typical three-year sequence on a Loudoun or Fairfax property looks like this. Year one: drainage, grading, a retaining wall or patio if the plan calls for one, sleeves under walks for future irrigation and lighting cable, and the trees and evergreen screen, planted in fall. Year two: the front foundation beds and the main back-yard beds, amended and planted in spring or fall, with the irrigation zones that serve them. Year three: perennials and groundcovers that fill in, lawn renovation by sod or seed in the fall window, and landscape lighting aimed at the trees that are now big enough to light.
Phasing also keeps the budget honest. Each phase is priced on its own, so the total plan can be ambitious while each year's spend stays fixed. The master plan is what makes that possible. Without it, year two tends to undo year one, and the money spent on a mature bed that has to move for a patio is simply lost. We explain how to sequence a whole property, including the trades involved, in the whole-property plan. For the order in which trades should arrive, our how it works page lays out the same logic for a single project.
What should you have ready before a design site visit?
Ten things that make the first meeting far more productive and keep the plan grounded in your property rather than a catalog.
- A copy of your plat or house location survey, which shows lot lines, easements and setbacks.
- Your HOA's architectural guidelines and application form, if you have an association.
- Photos of the yard after a heavy rain, showing where water stands or runs.
- A list of the windows you look out of most and what you want to see from each.
- Notes on where the sun falls at morning, noon and late afternoon in summer.
- The sprinkler controller zone map or any record of buried lines, if a system exists.
- Any plants you want to keep, and any you have lost more than once in the same spot.
- An honest number for hours per month you will spend on upkeep.
- The budget range you have in mind for this year, even if the full plan spans several.
- Photos of yards you like, with a note about what you like in each one.
Why is winter the best season to design a landscape?
Winter is the best season to design because the yard shows its structure, the calendar lines up with planting season, and design and review work is not competing with construction. In January and February the leaves are down, so we can see the real shape of the canopy, which trees shade which windows, where the grade drops and where the neighbor's house is visible from the patio. Wet spots are obvious after winter rain and snowmelt on cold clay. The bones of the property are on display, and a plan made against bones ages better than one made against August foliage.
The timing works forward, too. A plan drawn in February can be submitted to an HOA in March and installed in April and May, or held for the stronger fall planting window from late September through November, which we describe in fall planting and landscape installation. Either way the plan exists before the nurseries sell out of the best sizes, which in a busy spring happens by mid-April for popular natives. Design in May and you are planting in the heat of June or waiting until fall anyway.
There is a practical reason as well. Design work is desk work, and winter is when our schedule has room for it. The same is true of county permit offices and most HOA committees, which see their lightest application volume between Thanksgiving and March. A February application moves faster than an April one.
Winter design also feeds winter construction. Retaining walls, drainage lines and patio bases can be built on dry, unfrozen days through most Northern Virginia winters, so a plan that includes hardscape can see its first phase finished before the first plant arrives. That is the order we want anyway.
How much does landscape design and installation cost in Northern Virginia in 2026?
As of 2026, typical Northern Virginia market planning ranges for landscape design run from a few hundred dollars for a planting plan covering a single bed or the front of a house to roughly $1,500 to $5,000 or more for a scaled master plan of a whole property with concept drawings, a planting plan and phasing. Some firms credit part of a design fee toward installation; others price design and installation separately. Ask which applies before the drawing starts.
Installation is the larger number. A front foundation planting with new beds, soil amendment, edging and mulch commonly runs $4,000 to $12,000. A full property with trees, evergreen screening, beds and groundcovers commonly runs $15,000 to $50,000 or more, which is why most of those are phased over two or three years. Individual elements help with planning: installed evergreen screening trees of six to eight feet often run $250 to $700 each, container shrubs in three-gallon sizes often land between $60 and $150 installed, perennials in one-gallon pots often run $15 to $40 installed, and bulk compost or mulch delivered and spread is often $80 to $150 per cubic yard. These are general market ranges, not myYardPros prices, and they will differ between a flat Ashburn lot and a sloped, wooded Great Falls one.
What moves the number: plant sizes, since a two-inch caliper tree costs several times a smaller one and large shrubs cost more to handle; how much old planting, rock, weed fabric and root mass must come out; the total bed area to amend, edge and mulch; access for equipment and deliveries; slope; and whether drainage, a wall or irrigation is part of the scope. Smaller plants often catch up with larger ones within three or four seasons, so on a tight budget we put money into soil preparation and buy younger stock.
The cost guide has planning ranges for every service we offer, including the walls, patios and drainage that often share a landscape budget. For a figure that fits your property and your phasing, the only reliable number is a written estimate after a site visit.
How does landscape design differ across Fairfax, Loudoun, Prince William, Arlington and Alexandria?
The design process is the same everywhere, but the site conditions change the plan. In older Fairfax County neighborhoods such as Vienna, McLean, Annandale and Burke, the defining feature is mature canopy. Lots are half an acre or more, oaks and maples are fifty to eighty years old, and the plan is mostly about shade beds, protecting roots and finding the one sunny corner for a vegetable bed or a flowering tree. Deer are heavy in Great Falls, Oakton and Clifton and moderate elsewhere in the county.
Loudoun County splits in two. Eastern Loudoun, including Ashburn, Sterling, South Riding and Brambleton, is largely planned communities built in the last thirty years on graded clay subsoil with the topsoil scraped off, under HOA review, with young trees and full sun. The plan there is about building soil, creating privacy quickly and working within guidelines. Western Loudoun, from Leesburg out to Purcellville and Aldie, has larger lots, rockier ground, well water, heavier deer pressure and often no HOA, so the plan is about screening, meadow-style planting and lower upkeep across more area.
Prince William County communities around Gainesville, Haymarket, Bristow and Woodbridge resemble eastern Loudoun: newer construction, compacted subsoil, HOA guidelines and open sun. Arlington County and the cities of Alexandria and Falls Church are the opposite problem, with small lots, mature street trees, tight setbacks and often a rowhouse or bungalow where the entire front garden is a few hundred square feet. Designs there are detailed and small, and every plant has to earn its spot. The lawn and landscape pillar explains how our services fit together across all of these places, and our service areas page lists every county and city we work in.
Whatever the location, slope changes the plan more than anything else. A sloped back yard in Reston or Lorton needs terracing, a wall or deep-rooted massing before it needs a plant list, and we weigh those choices in slopes and erosion: retaining wall, regrading or planting. Upkeep after installation is covered in our maintenance guide.
Frequently asked questions
Do I need a landscape designer or can I just buy plants?
You can buy plants, and for a single bed with clear sun and no drainage problem that often works. A designer earns the fee when the yard has shade, slope, wet clay, deer or an HOA, when several projects have to happen in sequence, or when you want the whole property to read as one place rather than a series of separate purchases. A scaled plan also prevents the most expensive mistake, which is planting something that has to be removed.
How long does a landscape design take in Northern Virginia?
A planting plan for one area usually takes a couple of weeks from site visit to final drawing. A whole-property master plan with concept review and revisions commonly takes four to eight weeks, longer in the busy spring. Add HOA review, which is typically a few weeks and can be a month or more if a submission misses a monthly meeting. Designing in winter leaves time for all of that before the spring or fall planting window.
Are native plants better for a Northern Virginia landscape?
Often, yes. Plants native to the mid-Atlantic evolved on clay in humid summers and cold snaps, so they establish with less help and support birds and pollinators. They are not automatically deer-resistant or low-maintenance, and some spread aggressively in a small bed. Most of our plans use Virginia natives as the backbone and add well-behaved adapted plants such as boxwood, catmint or hellebores where the design needs evergreen structure or a long bloom.
Can a landscape plan be installed in stages?
Yes, and most plans over a certain size should be. The master plan fixes the layout so each phase fits the next. Drainage and hardscape go first, trees and screening next, beds after that, and lawn and lighting last. Each phase is priced separately, which keeps the yearly spend fixed. The important thing is that the plan exists before phase one, so nothing built this year has to move next year.
How wide should a foundation bed be?
On a typical two-story colonial, we draw front beds at least five to six feet deep so shrubs can mature without touching the siding, and we keep the mature edge of any plant two to three feet off the wall. Townhome beds are often limited to three to four feet by the walk and HOA rules, which is why compact and columnar varieties matter there. A bed narrower than the mature width of its plants is a pruning sentence.
What should I do about the lawn that will not grow under my oak tree?
Stop fighting it. Tall fescue needs several hours of direct sun, and the ground under a mature oak rarely delivers that. Convert the area to a shade bed of ferns, sedges, foamflower and hellebores planted in small pots between roots, mulch it lightly, and water it for the first two summers. Do not till, raise the grade or cut large roots. Where you need a usable surface, a path or small patio laid on a shallow base is kinder to the tree than repeated seeding.
Does a landscape design include the patio, wall or drainage?
A full master plan shows where they belong and in what order, but each is designed and priced in its own trade. We draw the patio outline, wall location and drainage routes on the concept plan so the planting plan fits around them, then detail the hardscape and drainage separately. That keeps sleeves, grades and bed edges coordinated, which is the main reason to plan the whole property at once even when it will be built over several years.
Book the work
Put the plan in writing with a crew that builds this every week.
One visit to measure and talk through options, then a written scope and price. No pressure, no vague numbers. Ask about the Heroes Discount if you serve.
Sources and further reading
- Virginia Cooperative Extension, home landscape and plant selection publications
- Virginia Tech Soil Testing Laboratory (routine soil test through Virginia Cooperative Extension)
- Virginia 811 (Miss Utility): contact before you dig
- Fairfax County: Chesapeake Bay Preservation Ordinance and Resource Protection Areas
- Loudoun County government
Published February 19, 2026. Reviewed and updated October 9, 2026.