Key takeaways
- Winterize before the first hard freeze, not on a date. Here that usually means late October through mid-November, a week or two earlier in western Loudoun than in Arlington or Alexandria.
- The compressed-air blowout is the only method that reliably empties a typical Northern Virginia system, because most lots are too flat for drain valves to clear every low spot.
- Air volume matters more than pressure. Hold the regulator near 50 psi for poly and no more than about 80 psi for PVC, one zone at a time, never long on dry air.
- The backflow preventer is the most expensive part a freeze can crack. It is isolated, drained through its test cocks, left with valves at 45 degrees, and insulated or removed for the winter.
- As of 2026, a professional blowout on a typical residential system is a modest line item compared with a cracked backflow assembly or split laterals found at spring start-up.
On this page
- What does sprinkler winterization actually do?
- When should you winterize a sprinkler system in Northern Virginia?
- Which components are most at risk from a freeze?
- Why is the backflow preventer the most expensive freeze failure, and how do you protect it?
- Manual drain, automatic drain or compressed-air blowout: which method is right?
- How do the three winterization methods compare?
- What size compressor does a blowout need, and what pressure is safe?
- What is the full shutdown sequence, step by step?
- How do drip and low-flow zones get winterized?
- What if you overseeded in September and still need to water in October?
- What do you do with the controller, sensors and shutoff over winter?
- What does sprinkler winterization cost in Northern Virginia?
- Should you winterize the system yourself or hire it out?
- What are the most common winterization mistakes?
- What happens at spring start-up, and why does it depend on the blowout?
- When should you book in Fairfax, Loudoun, Prince William and Arlington, and what if a freeze comes first?
- Frequently asked questions
What does sprinkler winterization actually do?
Winterization removes the water from every part of an irrigation system that can freeze, so that when the ground and the air drop below 32 degrees there is nothing left in the pipes, valves, heads and backflow preventer to expand and split them. Water grows by about nine percent in volume as it turns to ice, and it does so with enough force to crack brass, split PVC along its length, burst polyethylene at the fittings and push the internals out of a sprinkler head. A system that was full of water in a December cold snap does not always fail visibly. The damage shows up at spring start-up as a zone that will not hold pressure, a wet spot over a split lateral, or a backflow assembly that sprays from a cracked bonnet the moment the supply is opened.
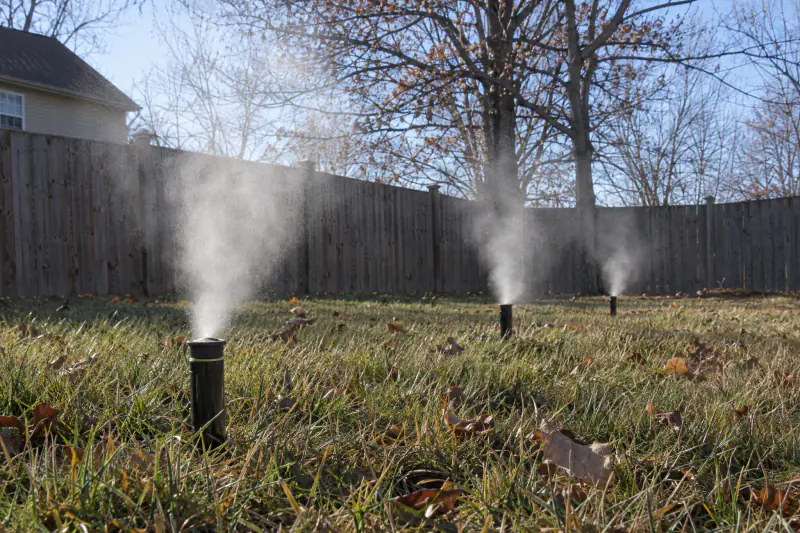
In Northern Virginia the job has three parts. The supply to the irrigation system is shut off, usually at a valve inside the basement or garage where the irrigation line leaves the house plumbing. The backflow preventer, the brass assembly mounted above ground outside, is drained and left open in a way that lets any remaining water expand without breaking anything. Then each zone is cleared, almost always with compressed air, until the heads throw mist rather than water. The controller is set to a winter mode so it does not open valves on a dry system.
Everything that follows is detail on those three parts: when to do them, which method to use, what pressure and volume of air are safe, what the backflow needs, and what it costs. If your system was installed with winterization in mind, which is how we build a sprinkler system, there is a blowout port right after the backflow, the valves sit in accessible boxes, and the main line has no deep low spots to trap water. If it was not, the job is still entirely doable; it just takes more care.
When should you winterize a sprinkler system in Northern Virginia?
Before the first hard freeze, which is a forecast, not a date. A hard freeze, as forecasters generally use the term, is a stretch of several hours at about 28 degrees or lower, cold enough to freeze water in exposed pipe. A light frost at 31 degrees for an hour before dawn will not hurt buried laterals or a drained backflow. A night in the mid-20s will crack a full backflow preventer standing eighteen inches above the lawn. So the rule we work from is simple: the system should be blown out before the ten-day forecast shows the first night in the 20s, and the backflow should be drained before any night forecast below about 28.
In practice that means late October through mid-November for most of our area. NOAA climate normals put the average first 32-degree night somewhere around the third or fourth week of October at Dulles Airport in eastern Loudoun, and into the second half of November at Reagan National beside Arlington and Alexandria. Those are averages for 32 degrees, and the first hard freeze usually follows a week or two behind. Western Loudoun, around Purcellville, Leesburg and out toward the Blue Ridge, sits higher and runs colder; there the first hard freeze can arrive in the second half of October. Great Falls and Clifton, with their open ground and low spots, often frost earlier than the surrounding suburbs. Inner Fairfax, Arlington and Alexandria, with more pavement and tree cover holding heat, run latest.
Two things make the timing harder than it sounds. First, the fall seeding window, which we cover below, means many homeowners still want to water into October, and the pressure to keep the system on collides with the first cold snap. Second, the companies that do blowouts are busiest in exactly the two weeks the forecast turns, which is why the booking section below matters. The short version: book for late October or early November, keep an eye on the ten-day forecast, and be ready to move the date up if a cold front is coming. Our 2026 yard calendar places the blowout against everything else that happens in a Northern Virginia fall.
Which components are most at risk from a freeze?
Every part of a residential system, where it sits, how likely it is to freeze with water in it, and what a failure typically means in spring.
| Component | Where it sits | Freeze risk if left full | Typical failure and repair |
|---|---|---|---|
| Backflow preventer | Above ground outside, 12 to 24 inches up on a riser | Highest; exposed on all sides | Cracked body, bonnet or ball valve; replace the assembly, retest where required |
| Supply riser and shutoff | From the house wall up to the backflow | High; copper or PVC in open air | Split pipe or cracked valve at the wall; repair by a plumber or irrigation tech |
| Main line | Buried 8 to 12 inches, pressurized all season | Moderate; freezes in prolonged cold | Split along its length; dig, cut and splice, often across the lawn |
| Zone valves and manifolds | In valve boxes near grade | High; boxes are shallow and vented | Cracked valve bodies, blown diaphragms; replace valves |
| Lateral lines | Buried 6 to 12 inches, unpressurized between cycles | Moderate; low spots hold water | Split at fittings and bellies; dig and repair spring wet spots |
| Spray and rotor heads | At grade, body in soil | Moderate; water sits in the riser and body | Cracked bodies, stripped gears, blown seals; replace heads |
| Drip tubing, filters and regulators | At or just below mulch | High for filters and regulators; tubing tolerates some ice | Cracked filter bowls and regulators; replace at the valve |
| Controller, rain sensor, flow meter | Garage wall, eave, main line | Low for electronics; sensors are weatherproof | Lost program if power is cut; set to off or rain mode instead |
Buried pipe is above the frost line on most systems, so a long cold spell can reach it. The exposed brass at the backflow fails first and costs most.
Why is the backflow preventer the most expensive freeze failure, and how do you protect it?
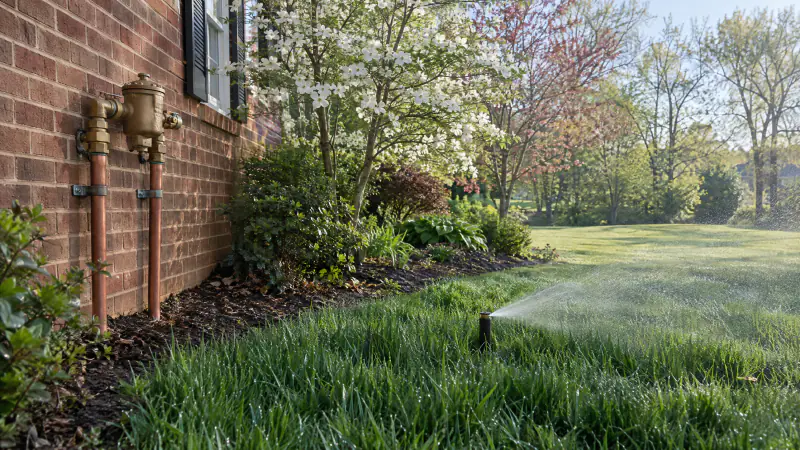
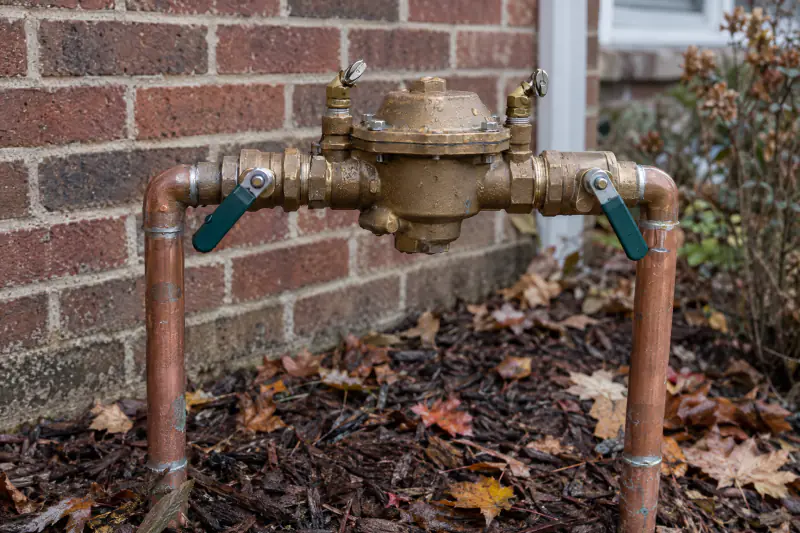
Because it is the one part of the system that stands in the open air, it is made of brass with precise internal seals, and it cannot simply be patched: a cracked assembly is replaced, and in most Northern Virginia jurisdictions the replacement is a plumbing job that may involve a permit and a test by an approved tester before the system is used again. On a typical residential system the backflow is a pressure vacuum breaker, a brass body with an inlet ball valve, an outlet ball valve, a bonnet on top and two small test cocks on the side. Some homes have a reduced-pressure assembly, which is larger and more expensive, or a double check valve. All of them hold water when the supply is shut off, and all of them crack when that water freezes.
Draining one is straightforward once you know the sequence. The supply to the irrigation line is closed at the house first. Then the inlet ball valve on the backflow is closed. The test cocks are opened with a flat screwdriver, which lets air in and water out of the body; a few ounces drain onto the mulch. The outlet valve is opened to let the riser below drain. Once the blowout of the zones is done, every valve and test cock on the assembly is set to about 45 degrees, half open. That position matters: a ball valve closed tight traps water inside the ball, and a fully open one can trap water in the body. Half open gives any remaining drops room to expand into air instead of brass.
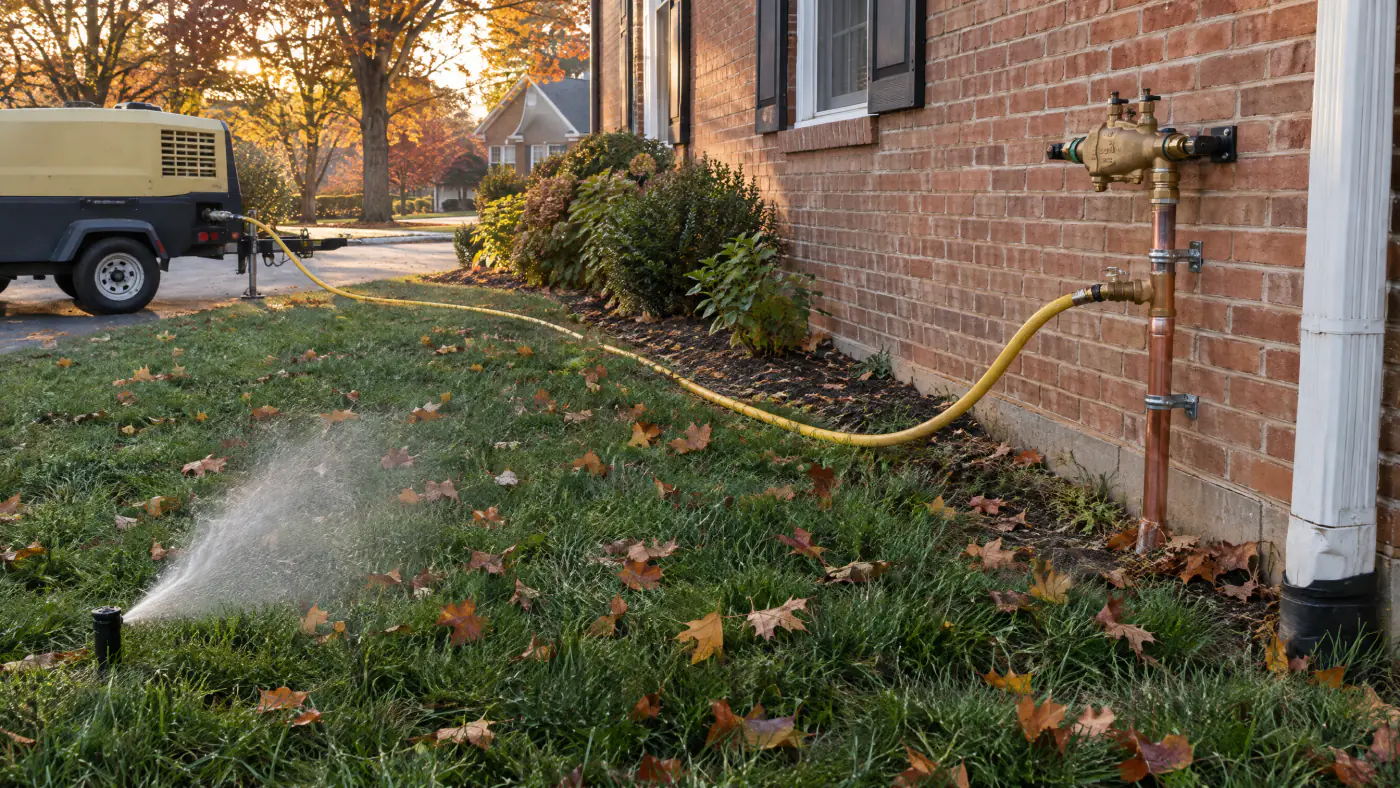
Then it is protected. The simplest measure is an insulated pouch or bag made for backflow assemblies, pulled over the drained device and cinched at the riser. On systems where the assembly is connected with unions, which is how we install them, the whole device can be unscrewed and stored indoors for the winter, which removes the risk entirely and also makes the annual test easier to schedule in spring. The one thing never to do is to blow compressed air through the backflow itself. Air at blowout pressure can damage the check seals and the bonnet, and most manufacturers say so plainly. The compressor connects to a blowout port downstream of the backflow, and the device is drained by gravity and air from the test cocks, not by the compressor. If your system has no blowout port after the backflow, adding one is a small job we recommend doing with the next irrigation upgrade.
Manual drain, automatic drain or compressed-air blowout: which method is right?
For almost every residential system in Northern Virginia, the compressed-air blowout, and the honest reason is that the other two depend on gravity and our lots are too flat to give gravity a chance. The manual drain method requires a system installed with manual drain valves at every low point of the main line and each lateral, with pipe pitched continuously toward them. Open the valves, wait, and the water runs out. It works on sloped lots where the installer planned for it. It leaves water in the heads, in the valves and in any section of pipe that sags between the drain points, and on a typical quarter-acre lot in South Riding or Burke that was plowed in with a vibratory plow following the grade, there are dozens of those sags.
Automatic drain valves are small spring-loaded fittings threaded into the lateral lines at low points. When the zone shuts off and pressure drops below roughly ten psi, the spring opens the valve and water drains into a small gravel pocket in the soil. They are common on older systems and on some builder installs. Their weaknesses in clay are real: the gravel pocket silts in and stops draining, the valves themselves clog with grit, they drain only the spot they sit in, and because they open after every single cycle they can keep a patch of lawn permanently wet all season. They also do nothing for the main line, which stays pressurized, or for the backflow.
The blowout uses a compressor connected downstream of the backflow to push air through each zone in turn until the heads throw only mist. It clears heads, valves, laterals and the main, regardless of slope. It is the method every irrigation manufacturer describes for cold climates, and it is what the professionals in our region use. Its risks are the risks of compressed air: too much pressure or too long a run on dry air damages heads and fittings, and a small compressor that cannot move enough air tempts people to raise the pressure to compensate. Done with the right equipment and a zone-by-zone sequence, it is reliable and quick. Many systems use a combination: drain valves that empty most of the water passively, with a blowout to finish. Our view is that the combination is fine, and that a blowout alone is sufficient; drains alone, in this soil and on these lots, are not.
How do the three winterization methods compare?
The same system, three ways of emptying it, judged on Northern Virginia lots and clay.
| Method | How it works | What it clears | Where it falls short here |
|---|---|---|---|
| Manual drain valves | Valves at low points are opened by hand; water runs out by gravity | Main and laterals near each valve, if pipe is pitched to them | Needs a sloped lot and a planned layout; leaves water in heads, valves and sags |
| Automatic drain valves | Spring-loaded fittings open below about 10 psi after each cycle | The low point each valve sits in, on the laterals only | Silt in clay, clog with grit, keep spots wet all season, do nothing for the main or backflow |
| Compressed-air blowout | Compressor pushes air through each zone downstream of the backflow | Heads, valves, laterals and main, regardless of slope | Requires the right CFM, a regulator and discipline about pressure and run time |
| Combination | Drains empty what they can; air finishes the job | Everything, with less air time per zone | Only as good as the blowout step; drains are a convenience, not a substitute |
What size compressor does a blowout need, and what pressure is safe?
The number that matters is cubic feet per minute, the volume of air the compressor can deliver, not the pressure on its gauge, and this is the single most misunderstood part of winterization. A sprinkler zone is a set of pipes with open ends. To push water out of it you need enough air moving through to carry the water ahead of it to the heads. Volume does that. Pressure only tells you how hard the air is pushing against the water and the pipe walls. A compressor that moves plenty of air at a modest pressure clears a zone in a couple of minutes. A small compressor that moves very little air will never clear the zone no matter how high its pressure goes, and raising the pressure to compensate is how heads get blown apart.
Manufacturer guidance scales with the system. Rain Bird's homeowner guidance calls for a compressor delivering roughly 10 to 25 cfm through a pressure regulator, and Hunter's contractor guidance calls for 80 to 100 cfm for a mainline of 2 inches or less. The towable compressors irrigation contractors bring sit in that upper range, which is why a professional blowout of an eight-zone system takes well under an hour. A homeowner's pancake or wheelbarrow compressor rated at two to six cfm at 90 psi is the kind Rain Bird warns against: it can clear a small zone slowly, in several passes, and struggles badly with rotor zones and long laterals. If you rent, ask for the cfm rating and rent the tow-behind unit; the daily rate is a fraction of a single lateral repair.
Pressure limits are set by the pipe. Polyethylene, the black flexible pipe used for most laterals in our region, should see no more than about 50 psi of air. PVC, common on main lines and on older systems, tolerates more but should be held to about 80 psi at most. Those are the limits Hunter publishes; Rain Bird's homeowner guidance is more conservative and holds the whole system at 50 psi or below, which is the safer setting when you are not sure what pipe is in the ground. Set the regulator on the compressor before it is connected to the system, verify it on a gauge at the blowout port, and leave it there. Air behaves differently from water: it compresses, it heats as it moves fast through fittings, and it reaches the heads with far more velocity than water ever does. That is why the other rule is about time. A zone is finished when the heads throw a thin mist and nothing more. Running it further on dry air heats the rotor gears and the plastic bodies and can strip or melt them in less than a minute. Two short passes beat one long one. We walk through the pressure checks again in the spring start-up checklist, because the same pipe limits apply when water comes back.
What is the full shutdown sequence, step by step?
The order we use on a typical residential system with a pressure vacuum breaker and a blowout port. Systems vary; the logic does not.
Shut off the irrigation supply at the house
Find the valve where the irrigation line leaves the home's plumbing, often in the basement or garage near the main shutoff, and close it. If it is a ball valve, the handle goes across the pipe. Some systems also have a drain fitting beside it for the pipe inside the wall.
Set the controller to off or rain mode
Do not unplug it. Many controllers lose their program without a battery backup, and some wake up in the spring with factory defaults. Rain mode or off keeps the schedule and the zone data for next year. Note any zone that has been troublesome; you will test it first in spring.
Close the backflow inlet, open the test cocks
Close the inlet ball valve on the backflow preventer. Open both test cocks a quarter turn with a flat screwdriver so the body can drain and air can enter. Open the outlet valve so the riser and the first run of main line can empty toward the blowout port.
Connect the compressor at the blowout port
Attach the air hose to the blowout fitting downstream of the backflow, never upstream of it or through it. Set the regulator before connecting: about 50 psi for poly laterals, no more than about 80 psi for PVC. Confirm the setting on a gauge at the port.
Open one zone from the controller, then start the air
Use the controller's manual run or open the zone valve by hand, then introduce air slowly. Starting air into a closed system spikes pressure. Begin with the zone farthest from the compressor or the highest in elevation, since it holds the most water against gravity.
Run until the heads throw only mist, then stop
Watch the heads. Water, then spray, then a thin mist in one to two minutes on most zones. Stop as soon as the mist is thin. Close that zone, open the next, and repeat. Move through every zone, including drip zones at a lower pressure as described below.
Make a second, shorter pass
Water trapped in low spots drains back toward the heads after the first pass. A second pass of thirty to sixty seconds per zone picks it up. This matters most on long rotor zones and on systems installed by plow with many small sags.
Clear the main line last
With all zone valves closed, open the valve nearest the end of the main, or the last zone, and clear the main itself. Some systems have a manual drain at the low point of the main; open it and leave it open for the winter if it drains to gravel.
Disconnect the air and finish the backflow
Shut the compressor down and bleed the hose before disconnecting. Set both ball valves and both test cocks on the backflow to 45 degrees. Fit the insulated cover, or remove the assembly at its unions and store it indoors.
Walk the yard and record what you saw
Note any head that did not pop up, any zone that took much longer to clear, and any wet spot that was not there before. Those are the spring repairs. Flag the shutoff, the blowout port and the controller setting for whoever starts the system in March or April.
How do drip and low-flow zones get winterized?
Gently, and with the end caps open. A drip zone is built to run at low pressure, usually 25 to 30 psi downstream of its regulator, and the emitters pass only a trickle of water each. Pushing blowout air at 50 psi into a drip zone does two unhelpful things: the regulator at the valve throttles the air so the tubing never really clears, and the back pressure can pop fittings and emitters out of the quarter-inch tubing. The right approach is to open the flush valves or end caps at the ends of the drip runs so the air has somewhere to go, lower the regulator on the compressor to something near the zone's working pressure, and let the air push the water out of the open ends rather than through the emitters.
The parts of a drip zone that actually crack in a freeze are usually at the valve: the filter and the pressure regulator. Filter bowls are plastic and hold water; they should be unscrewed, the screen rinsed and the bowl left open or stored. Pressure regulators hold a small amount of water in their body and are inexpensive to replace but annoying to discover cracked in April. Many installers put the filter and regulator in the valve box, where they get some protection from the soil, and we prefer that. Where they sit above grade, they are drained and covered along with everything else.
Polyethylene drip tubing itself tolerates some ice because it can stretch, which is why a bed zone that was never blown out often survives a winter while the filter beside it does not. Micro-spray and bubbler zones in beds are treated like spray zones at reduced pressure. Low-flow rotary nozzle zones on the lawn, the kind we install on retrofits to slow the application rate for clay, are blown out like any other spray zone; their nozzles pass air well and the usual pressure limits apply. If you are not sure which zones are drip, the controller labels, the valve box, or the thin tubing visible under the mulch will tell you, and the maintenance guide keeps a short seasonal list for beds and lawn.
What if you overseeded in September and still need to water in October?
Then you keep the system running as long as the forecast allows, protect the backflow on any cold night, and switch to a hose for the last stretch. This is the most common timing conflict we see in a Northern Virginia fall, and it is a real one. Tall fescue seed sown in the September window needs light, frequent watering for two to three weeks to germinate and a few more weeks of moisture to establish, which puts the lawn's needs squarely into the second half of October. The first frosty nights arrive in the same weeks. A system that is blown out on October 15 to be safe can leave a new seeding to dry out in a warm, windy late-October spell. A system left running to be thorough can meet a hard freeze with full pipes.
The practical middle path has three parts. First, watch the ten-day forecast rather than the calendar. Buried laterals and heads are not harmed by a single light frost; the risk on a frosty night is the exposed backflow and riser, which can be protected with an insulated cover while the system keeps running by day. Second, if a hard freeze is forecast and the seeding is still young, winterize the system and finish the job with a hose and an oscillating sprinkler for the remaining week or two. New seedlings in late October need far less water than they did in September; the soil is cool and evaporation is low. Third, set the controller's rain and freeze sensor so that it will not run a cycle on a freezing morning, which coats the lawn in ice and does nothing for the seed.
The best fix is upstream: seed early in the window. A lawn sown in the first half of September is established by the middle of October and does not care when the blowout happens. Our fall lawn renovation plan builds the seeding schedule around that logic, and the aeration and overseeding page describes the work itself. If the seed went down late, accept that the last watering will be by hand and do not gamble the backflow on it.
What do you do with the controller, sensors and shutoff over winter?
Leave the controller powered and set to off or rain mode, leave the sensors where they are, and leave the indoor shutoff closed with a tag on it. The controller is the part people most often get wrong. Pulling the plug feels tidy, but many controllers rely on a small battery or capacitor to hold their program, and after four months without power some wake up blank. A smart controller set to off keeps its zone data, its soil and slope settings, and its watering history, and it is one tap away from a spring start. Some weather-based controllers also offer a seasonal shutdown that suspends scheduling until a date you set, which is convenient as long as that date is after the last hard freeze of spring.
The rain sensor on the gutter edge and the freeze sensor, if there is one, are built for weather and stay put. A flow meter plumbed into the main line is cleared with the main during the blowout and otherwise needs nothing. Wireless soil-moisture sensors are a special case: their probes are buried in the root zone and are generally fine over winter, but the battery-powered transmitter above ground should be checked in spring, and the probe location should be marked so a spring aeration does not find it.
The shutoff inside the house deserves a tag because the person who opens it in April may not be the person who closed it in November. Write the date and the words "irrigation, off for winter" on a tag or a strip of tape. If the line has a drain fitting beside the valve, open it into a bucket after the valve is closed so the pipe between the valve and the exterior wall empties too; a freeze inside an uninsulated garage wall is rare but expensive. Finally, if the system has a master valve or a pump start relay, confirm the controller cannot energize it while the supply is closed. A valve that opens on a dry main does no harm; a pump that runs dry can burn out.
What does sprinkler winterization cost in Northern Virginia?
As of 2026, typical Northern Virginia market ranges for a professional sprinkler blowout on a residential system run roughly $75 to $200 for a system of up to about eight zones, with larger systems priced by the zone above that, often a few dollars per additional zone. These are regional planning figures, not our prices. The visit usually takes thirty to sixty minutes with a towable compressor and includes the backflow drain and the controller setting. Insulated backflow covers are a small add-on when they are not already on the house, typically in the range of a few tens of dollars for the part. Many companies offer a combined price for fall winterization and spring start-up booked together, which tends to be a little less than the two visits priced separately.
The costs the blowout prevents are the ones worth knowing. Replacing a cracked pressure vacuum breaker, with the plumbing work and any required retest, commonly runs several hundred dollars to more than a thousand depending on the size and type of the assembly, and a reduced-pressure assembly costs more. A split lateral found as a wet spot in May means digging, cutting and splicing, often a few hundred dollars per repair, with lawn restoration on top. A cracked zone valve runs in the range of $150 to $450 replaced. Several of those in one spring, which is what an unwinterized system through a cold winter produces, adds up to many years of blowouts.
For homeowners doing it themselves, the main cost is the compressor. Renting a towable unit with enough cfm for a typical system is commonly a hundred to a few hundred dollars for a day, and the fittings to connect it are inexpensive. What moves the professional number: zone count, whether the system has a blowout port or the technician has to improvise a connection, drip zones that need a separate lower-pressure pass, a backflow that needs removal and storage rather than a cover, and travel distance for a single visit. The backflow test that many local utilities require each year is a separate charge by an approved tester, usually scheduled in spring rather than fall. The cost guide puts these figures beside the rest of the yard's running costs, and for a system we have not seen, the only reliable price is one written after someone has counted the zones and found the backflow.
Should you winterize the system yourself or hire it out?
Hire it if you do not own or want to rent a compressor with real volume, if your system has no blowout port after the backflow, or if you are not sure what kind of pipe is in the ground. Do it yourself if you have a compressor of adequate cfm, a regulator and gauge you trust, a system you know, and the patience to go zone by zone. The job is not difficult. The mistakes, though, are expensive in a way that is out of proportion with the modest fee a professional charges, and almost all of them come from the equipment rather than the person.
The homeowner failure pattern is predictable. A small shop compressor is connected, the first zone will not clear, the regulator gets turned up to 100 psi, and either a head lets go or the poly lateral splits at a fitting that was marginal already. Or the blowout is done correctly but the backflow is shut off full. Or the system is blown out through the backflow because that was the only hose bib available, and the check seals are damaged, which shows up as a failed test in spring. Or the controller is unplugged and loses its program. None of those are character flaws; they are what happens when the equipment and the sequence are unfamiliar.
A professional visit brings the right compressor, a known sequence, and a second set of eyes on the system. The technician sees which zone took too long to clear and which head did not rise, which is useful information for spring repairs. The fee is small against the parts at risk. If you want a middle course, do the shutoff, the controller and the backflow drain yourself, since those need no equipment, and have the zones blown out professionally. The sequence above is written so that either approach works, and our how it works page describes what a service visit looks like from the first call.
What are the most common winterization mistakes?
The ones we fix at spring start-up, in roughly the order we see them.
- Shutting off the backflow preventer with water still inside it instead of draining it through the test cocks.
- Blowing air through the backflow assembly rather than connecting downstream at a blowout port.
- Raising the regulator past 50 psi on poly or 80 psi on PVC because a small compressor could not clear the zone.
- Running a zone on dry air for several minutes until the rotor gears or spray bodies overheat.
- Opening the air into a closed system before a zone valve is open, spiking pressure on the main.
- Skipping the second pass, so water that drained back into low spots freezes in the laterals.
- Forgetting drip zones, or blowing them at full pressure with the end caps closed.
- Leaving the backflow ball valves fully closed or fully open instead of at 45 degrees.
- Unplugging the controller and losing the program, the zone names and the smart settings.
- Winterizing on a date rather than on the forecast, either too early for a new seeding or too late for the first freeze.
- Not tagging the indoor shutoff, so the spring start-up begins with a search of the basement.
What happens at spring start-up, and why does it depend on the blowout?
Spring start-up is the reverse of this sequence, done slowly, and everything that was noted in November becomes the repair list in April. The backflow valves are returned from 45 degrees to closed, the test cocks are closed, the insulated cover comes off or the assembly is reinstalled at its unions. The indoor shutoff is opened a little at a time so the main fills gradually rather than slamming full; a water hammer on a system that has been empty all winter is a good way to find the one weak fitting. Then the backflow inlet is opened, the outlet is opened, and the assembly is checked for drips before any zone runs.
Each zone is then run and watched, which is where a careful winterization pays off. A zone that cleared normally in November and runs normally in April is finished. A zone that took three passes to clear, or a head that did not rise, is where the technician looks first. Heads that heaved over winter are reset to grade. Nozzles that clogged with grit are cleaned. Arcs that shifted are corrected. The controller comes out of rain mode and the schedule is reset for spring, which is far less water than last August's settings. The timing of all this is late March to mid-April for most of our area, once hard freezes are reliably past, and a little later in western Loudoun.
If the backflow test is required by your utility, spring is when it is usually scheduled, after the system has been pressurized and before the summer watering season. A system that was properly drained and covered, or stored indoors, passes that test far more often than one that spent the winter full. The full checklist, with the pressure checks and the controller reset, is in our spring sprinkler start-up checklist. Start-up is also the natural moment to plan the upgrades that cut the summer bill, which we cover in smart irrigation controllers and your water bill.
When should you book in Fairfax, Loudoun, Prince William and Arlington, and what if a freeze comes first?
Book in September or early October for a late October or early November date, and let the forecast move it earlier if it has to. The blowout season in Northern Virginia is short and crowded: most systems in the region get winterized in the same three or four weeks, and the companies with the right compressors fill their calendars by the time the first cold front is in the ten-day forecast. Homeowners who call the day after the first frost are often looking at a wait, and that wait is the dangerous part. Booking early, with a date that can be moved up, is the whole strategy.
The date varies across the region by a week or two. Western Loudoun, from Leesburg and Purcellville out to Aldie and the foothills, should plan for the second half of October. Eastern Loudoun and western Fairfax, from Ashburn and Sterling through Herndon, Chantilly and Centreville, and Prince William around Gainesville, Haymarket and Bristow, usually land in late October or the first week of November. Inner Fairfax, Arlington, Alexandria and Falls Church, along with McLean and Vienna, can often wait until the first or second week of November, though a cold snap does not read the map. Homes on private wells in Great Falls and Clifton winterize the same way, with the added step of making sure the well pump cannot be called by the controller over winter.
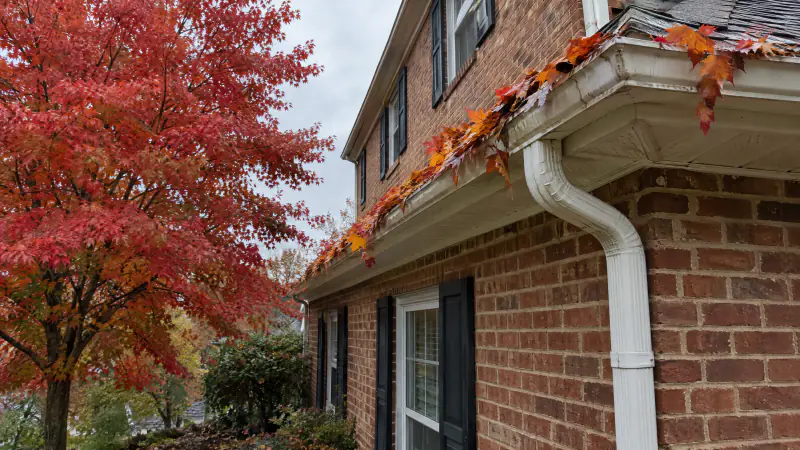
If a hard freeze is forecast before your appointment, do the parts that need no equipment that evening: close the indoor shutoff, set the controller to off, drain the backflow through its test cocks, set its valves to 45 degrees and cover it or bring it inside. The buried pipe will tolerate a night or two of cold; the exposed brass will not. Then keep the appointment for the blowout. Leaf season arrives in the same weeks, so while you are outside it is worth checking that the buried downspout lines are clear, which we cover in leaf season: gutters, downspouts and buried drain lines and on our downspout drainage page. We winterize and service systems across Fairfax, Loudoun, Prince William and Arlington counties and the cities of Alexandria, Fairfax, Falls Church, Manassas and Manassas Park; the service areas page lists every community, and the water management overview explains how irrigation and drainage work fit together on the same property.
Frequently asked questions
What temperature will damage a sprinkler system?
The exposed backflow preventer and riser are at risk the first time the air stays below about 28 degrees for several hours, which is what forecasters call a hard freeze. Buried laterals and heads, usually 6 to 12 inches down, need a longer stretch of cold before frost reaches them, but a prolonged spell in the 20s will get there. A light frost at 31 or 32 degrees for an hour before dawn does not harm a buried system.
Is it too late to winterize sprinklers if we already had a frost?
No. A frost is not a hard freeze, and the buried parts of the system are rarely damaged by the first frosty nights. Drain and cover the backflow preventer right away, since it is the exposed part, then have the zones blown out as soon as possible. Even after a hard freeze, winterizing promptly limits the damage to whatever froze that night rather than the whole system over the whole winter.
Can I winterize a sprinkler system without a compressor?
Only partially, and only on systems built for it. Manual or automatic drain valves at every low point can empty much of the pipe on a sloped lot, but on the flat lots common in Northern Virginia they leave water in heads, valves and sags. You can still do the parts that need no equipment: shut the supply, set the controller, drain the backflow and cover it. The zones themselves need air to be reliably clear.
How long does a sprinkler blowout take?
With a towable compressor delivering plenty of air, most residential systems of four to eight zones take thirty to sixty minutes, including the backflow drain and the controller setting. Each zone clears in one to two minutes on the first pass and well under a minute on the second. A small homeowner compressor takes far longer because each zone needs several passes, and it may never fully clear long rotor zones.
Do I need to winterize the backflow preventer separately from the blowout?
Yes. The blowout clears the zones but the backflow preventer sits upstream of the blowout port and holds its own water. It is drained by closing the inlet, opening the test cocks and the outlet, and then leaving every valve at 45 degrees once the zones are done. It is also the part that should never have compressed air blown through it. Insulate it or remove it at its unions and store it indoors.
Should the controller be unplugged for the winter?
We recommend against it. Set the controller to off or rain mode instead. Many controllers hold their program only while powered or with a small backup battery, and unplugging one for four months can erase zone names, run times and smart settings. A powered controller in off mode will not open any valve, and smart models keep their weather data and zone profiles ready for spring.
What pressure should I use to blow out poly versus PVC sprinkler pipe?
A common guideline is about 50 psi for polyethylene laterals and no more than about 80 psi for PVC, set at the regulator and checked on a gauge at the blowout port. The volume of air, measured in cfm, is what actually clears the pipe; pressure above those limits damages heads and fittings without clearing anything faster. If a zone will not clear at the right pressure, the compressor is too small.
Does a smart controller or freeze sensor make winterization unnecessary?
No. A freeze sensor stops the controller from running a cycle on a cold morning, which prevents ice on the lawn, but it does nothing about the water already standing in the pipes, valves, heads and backflow. Winterization removes that water. The two work together: the sensor protects the lawn during the shoulder weeks of October, and the blowout protects the system once the hard freezes begin.
Book the work
Put the plan in writing with a crew that builds this every week.
One visit to measure and talk through options, then a written scope and price. No pressure, no vague numbers. Ask about the Heroes Discount if you serve.
Sources and further reading
- Rain Bird: residential irrigation support and winterization guidance
- Hunter Industries: residential irrigation technical literature
- NOAA National Centers for Environmental Information: U.S. Climate Normals
- Virginia Cooperative Extension: lawn and turfgrass publications
- Fairfax Water: backflow prevention and cross-connection control
- EPA WaterSense: outdoor water use
Published October 1, 2026. Reviewed and updated October 9, 2026.